部署zabbix6.0+grafana(命令)
参考笔记本:部署zabbix服务端流程
1、部署服务端
cd ~
cat >install_zabbix6.sh<<'NYC'

########################################
#第3步有个域名要修改
########################################

#1、初始化
#同步时间
ntpdate 61.160.213.184
clock -w
echo "0 */1 * * * /usr/sbin/ntpdate 61.160.213.184 &> /dev/null" >> /var/spool/cron/root
#rdate -s time.nist.gov
#echo "0 */1 * * * /usr/bin/rdate -s time.nist.gov &> /dev/null" >> /var/spool/cron/root

#关闭防火墙及SELinux和NetworkMananger
systemctl disable --now firewalld.service
sed -ri 's#^(SELINUX=).*$#\1disabled#g' /etc/selinux/config
setenforce 0
systemctl disable --now NetworkManager

#优化SSH
sed -i '/UseDNS/a UseDNS no' /etc/ssh/sshd_config
systemctl restart  sshd

#2、添加源
#添加阿里源
mkdir /etc/yum.repos.d/bak
mv /etc/yum.repos.d/*.repo /etc/yum.repos.d/bak/
curl -o /etc/yum.repos.d/CentOS-Base.repo   http://mirrors.aliyun.com/repo/Centos-7.repo
curl -o /etc/yum.repos.d/epel.repo   http://mirrors.aliyun.com/repo/epel-7.repo
sed -ri 's@(.*aliyuncs)@#\1@g' /etc/yum.repos.d/CentOS-Base.repo
yum clean all
yum makecache
yum repolist

#添加nginx官方源并安装(1.22版本)
cat >/etc/yum.repos.d/nginx.repo<<'EOF'
[nginx-stable]
name=nginx stable repo
baseurl=http://nginx.org/packages/centos/$releasever/$basearch/
gpgcheck=1
enabled=1
gpgkey=https://nginx.org/keys/nginx_signing.key
module_hotfixes=true
EOF
yum install -y nginx

#添加PHP源并安装,依赖这个源webtatic-release.rpm
yum install -y epel-release
#rpm -Uvh https://mirror.webtatic.com/yum/el7/webtatic-release.rpm
wget --http-user=qwe --http-passwd=qwe http://61.160.213.184/dl/centos/webtatic-release.rpm
rpm -Uvh webtatic-release.rpm
# 卸载旧版本php
#rpm -e $(rpm -qa|grep php)
#rpm -qa|grep php
# 安装php程序及相关插件(可能提示都没有安装包)
yum install php72w-fpm php72w-cli php72w-gd php72w-mbstring php72w-bcmath php72w-xml php72w-ldap php72w-mysqlnd -y

#3、修改配置文件
#关联nginx+php(server_name zbx.oldni.cn改成自己的域名或IP地址)
cat >/etc/nginx/conf.d/01_zbx.oldni.cn.conf<<'EOF'
server {
  listen 80;
  server_name 103.73.119.12;
  root /app/code/zbx_oldni_cn;

  location / {
    index index.php;
  }
  location ~ \.php$ {
    fastcgi_pass 127.0.0.1:9000;
    fastcgi_index index.php;
    fastcgi_param SCRIPT_FILENAME $document_root$fastcgi_script_name;
    include fastcgi_params;
  }
}
EOF
#nginx -t

#修改php配置文件,配置php-fpm用户与Nginx的运行用户保持一致
sed -i '/^user/c user = nginx' /etc/php-fpm.d/www.conf
sed -i '/^group/c group = nginx' /etc/php-fpm.d/www.conf
#egrep "^user|^group" /etc/php-fpm.d/www.conf

#创建站点目录和首页测试文件
mkdir -p /app/code/zbx_oldni_cn
cat > /app/code/zbx_oldni_cn/index.php<<EOF
<?php
phpinfo();
?>
EOF

systemctl enable --now nginx php-fpm.service

#此时可以在windows服务器上测试网页是否能打开及PHP相关信息
#http://IP

#4、配置安装数据库
#配置mariadb10.5的yum源并安装
cat >/etc/yum.repos.d/mariadb.repo<<EOF
[mariadb]
name = MariaDB
baseurl = https://mirrors.aliyun.com/mariadb/yum/10.5/centos7-amd64/
gpgkey = https://mirrors.aliyun.com/mariadb/yum/RPM-GPG-KEY-MariaDB
gpgcheck =1
enabled = 1
EOF
yum install -y mariadb-server mariadb
systemctl enable --now mariadb

#创建库和管理用户,创建数据库要指定字符集,不能乱码
mysql -uroot -e 'create database zabbix charset utf8 collate utf8_bin;'
#创建对应的管理用户(允许本机登录访问,下面一条是允许同段的访问)
mysql -uroot -e "grant all on zabbix.* to zabbix@'localhost' identified by 'www.123.nyc';"
#mysql -uroot -e "grant all on zabbix.* to zabbix@'%' identified by 'www.123.nyc';"

#向数据库里导入zabbix初始数据
mkdir -p /server/tools
cd /server/tools
wget https://cdn.zabbix.com/zabbix/sources/stable/6.0/zabbix-6.0.9.tar.gz
tar zxvf zabbix-6.0.9.tar.gz
#不能使用‘cd !$’,进不去,后边的就安装不了了
cd zabbix-6.0.9/database/mysql/
mysql -uroot zabbix <schema.sql
mysql -uroot zabbix <images.sql
mysql -uroot zabbix <data.sql
mysql -uroot zabbix <double.sql
mysql -uroot zabbix <history_pk_prepare.sql

#5、编译安装zabbix-server
#安装依赖
yum install -y mysql-devel pcre-devel openssl-devel zlib-devel libxml2-devel net-snmp-devel net-snmp libssh2-devel OpenIPMI-devel libevent-devel openldap-devel libcurl-devel gcc gcc-c++
cd /server/tools/zabbix-6.0.9
./configure \
--sysconfdir=/etc/zabbix/ \
--enable-server \
--with-mysql \
--with-net-snmp \
--with-libxml2 \
--with-ssh2 \
--with-openipmi \
--with-zlib \
--with-libpthread \
--with-libevent \
--with-openssl \
--with-ldap \
--with-libcurl \
--with-libpcre
make install
#检查是否安装成功
#echo $?
#查看版本
#zabbix_server --version

#6、配置zabbix相关服务
#修改zabbix服务端配置文件(DB相关)
cp /etc/zabbix/zabbix_server.conf{,.bak}
sed -i '/# ListenPort=10051/a ListenPort=10051' /etc/zabbix/zabbix_server.conf
sed -i '/# DBHost=localhost/a DBHost=localhost' /etc/zabbix/zabbix_server.conf
sed -i '/# DBPassword=/a DBPassword=www.123.nyc' /etc/zabbix/zabbix_server.conf

#启动zabbix
#依赖一个zabbix虚拟用户
useradd zabbix -s /sbin/nologin -M
#zabbix_server
#ps -ed |grep zabbix

#书写systemctl配置文件
cat >/usr/lib/systemd/system/zabbix-server.service<<EOF
[Unit]
Description=Zabbix Server with MySQL DB
After=syslog.target network.target mysqld.service

[Service]
Type=simple
ExecStart=/usr/local/sbin/zabbix_server -f
User=zabbix

[Install]
WantedBy=multi-user.target
EOF

#修改zabbix日志位置
sed -ri 's#^LogFile=.*$#LogFile=/var/log/zabbix/zabbix_server.log#g' /etc/zabbix/zabbix_server.conf

#部署web UI代码
\cp -a /server/tools/zabbix-6.0.9/ui/* /app/code/zbx_oldni_cn/
chown -R nginx.nginx /app/code/zbx_oldni_cn/

#解决中文乱码的问题
cd /app/code/zbx_oldni_cn/assets/fonts/
cp DejaVuSans.ttf{,.bak}
wget -O DejaVuSans.ttf --http-user=qwe --http-passwd=qwe http://61.160.213.184/dl/centos/simyou.ttf

#systemctl命令重启服务
#pkill zabbix_server
systemctl enable --now zabbix-server
systemctl restart zabbix-server
#systemctl status zabbix-server


#7、解决web端检测报错的问题
cp /etc/php.ini{,.bak}
sed -i '/post_max_size =/c post_max_size = 16M' /etc/php.ini
sed -i '/max_execution_time =/c max_execution_time =300' /etc/php.ini
sed -i '/max_input_time =/c max_input_time = 300' /etc/php.ini
#重启php
systemctl restart php-fpm

#8、安装配置客户端
rpm -ivh https://mirrors.tuna.tsinghua.edu.cn/zabbix/zabbix/6.0/rhel/7/x86_64/zabbix-release-6.0-1.el7.noarch.rpm
sed -i 's#https://repo.zabbix.com/zabbix/#https://mirrors.tuna.tsinghua.edu.cn/zabbix/zabbix/#g' /etc/yum.repos.d/zabbix.repo
#安装zabbix-agent2
yum install -y zabbix-agent2
#启动zabbix-agent2
systemctl enable --now zabbix-agent2

systemctl restart zabbix-server
NYC
修改对应内容再执行脚本
bash install_zabbix6.sh2、web端配置
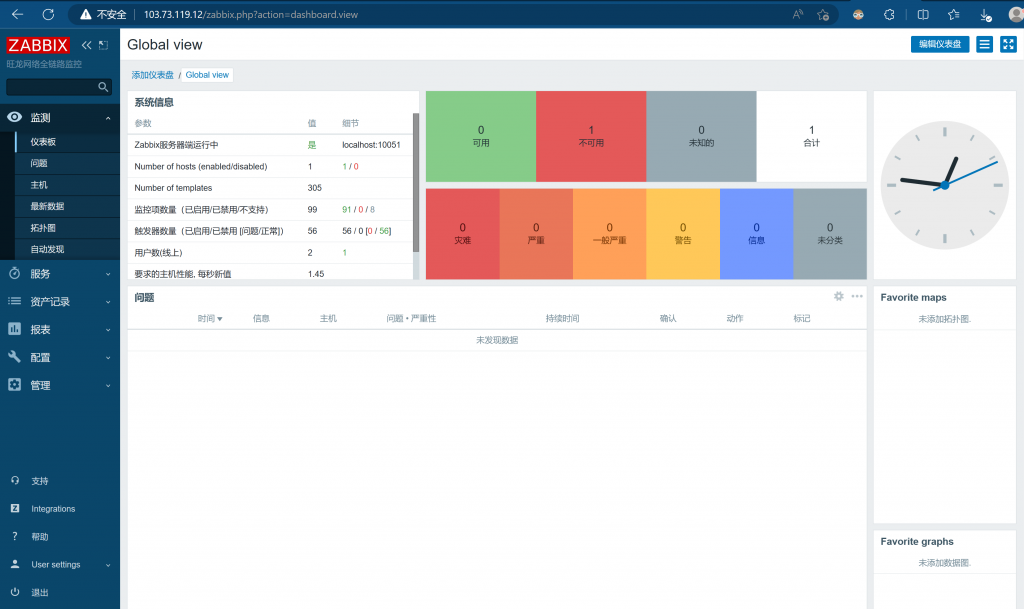
http://103.73.119.12
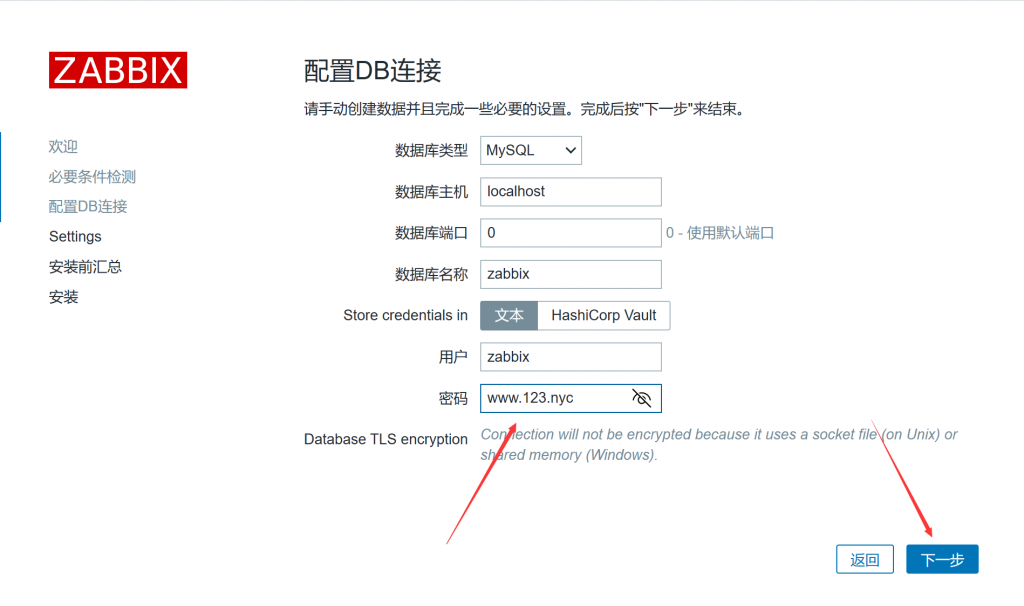
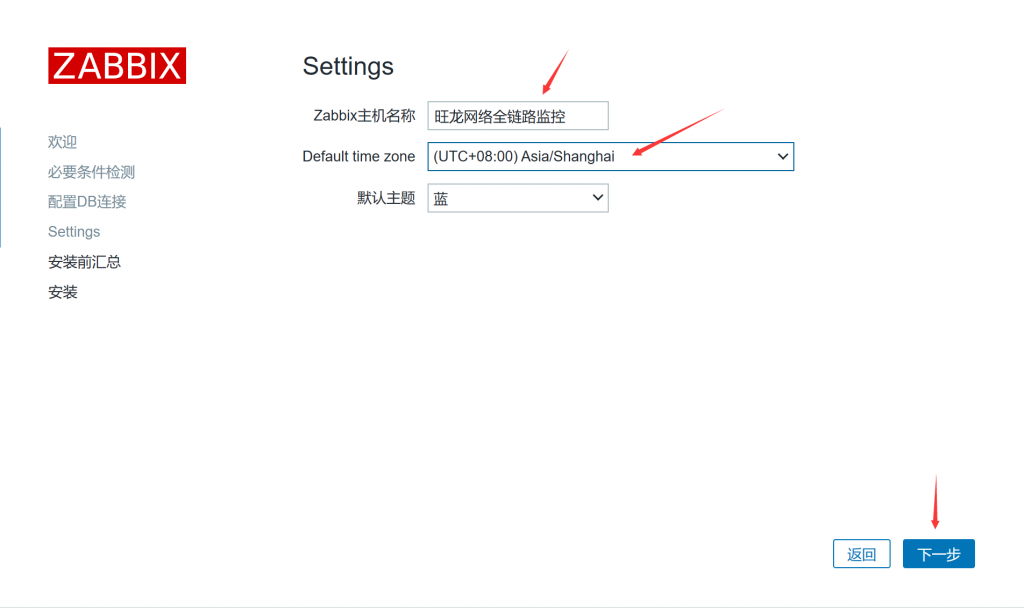
使用:Admin/zabbix登录
3、配置客户端
3.1、Linux客户端配置(自动注册配置,主要是下面4个蓝色内容修改)
cat >install_zabbix_agent.sh<<'NYC'

#############变量#################

#zabbix_server_ip=103.73.119.12
zabbix_server_ip=61.160.195.52

#############变量#################
#添加清华的安装源
rpm -ivh https://mirrors.tuna.tsinghua.edu.cn/zabbix/zabbix/6.0/rhel/7/x86_64/zabbix-release-6.0-1.el7.noarch.rpm
sed -i 's#https://repo.zabbix.com/zabbix/#https://mirrors.tuna.tsinghua.edu.cn/zabbix/zabbix/#g' /etc/yum.repos.d/zabbix.repo
#安装zabbix-agent2
yum install -y zabbix-agent2
cp /etc/zabbix/zabbix_agent2.conf{,.bak}
cat >/etc/zabbix/zabbix_agent2.conf<<EOF
PidFile=/run/zabbix/zabbix_agent2.pid
LogFile=/var/log/zabbix/zabbix_agent2.log
LogFileSize=0
Server=$zabbix_server_ip
ServerActive=$zabbix_server_ip
HostnameItem=system.hostname
HostMetadataItem=system.uname
Include=/etc/zabbix/zabbix_agent2.d/*.conf
ControlSocket=/tmp/agent.sock
Include=./zabbix_agent2.d/plugins.d/*.conf
EOF
#启动zabbix-agent2
systemctl enable --now zabbix-agent2
NYC修改zabbix_server_ip地址后再执行脚本
bash install_zabbix_agent.sh3.2、服务器端配置自动注册动作
先创建个主机组,方便自动注册进来的服务器分类存放

配置自动注册
创建动作


说明:对应客户端配置文件里的”HostMetadataItem=system.uname“
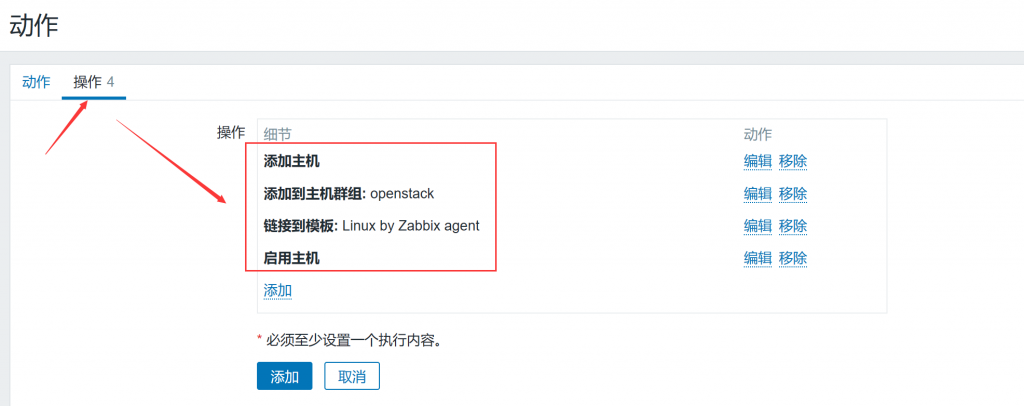
此时就创建好了自动注册

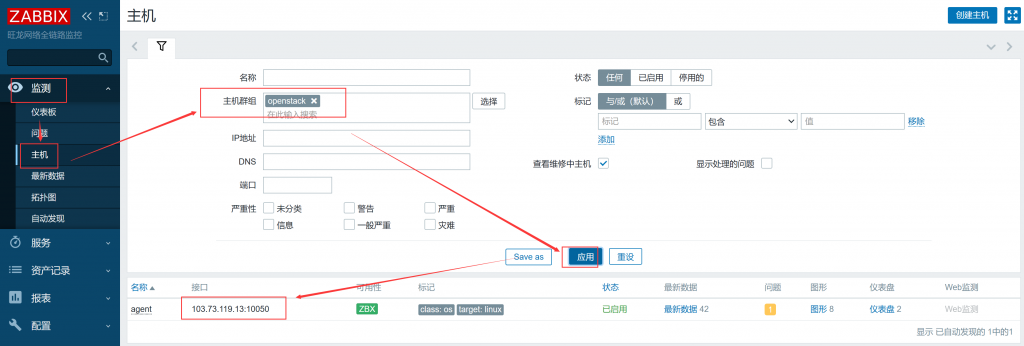
查看下客户端是否注册进来(以主机名命名的)
4、部署grafana8.0(在zabbix服务端服务器上部署都行)
4.1、部署
cd /server/tools/
wget https://mirrors.tuna.tsinghua.edu.cn/grafana/yum/rpm/Packages/grafana-8.0.3-1.x86_64.rpm --no-check-certificate
yum localinstall -y grafana-8.0.3-1.x86_64.rpm

#安装zabbix插件
#安装插件:
grafana-cli plugins install alexanderzobnin-zabbix-app
systemctl enable --now grafana-server4.2、访问测试:
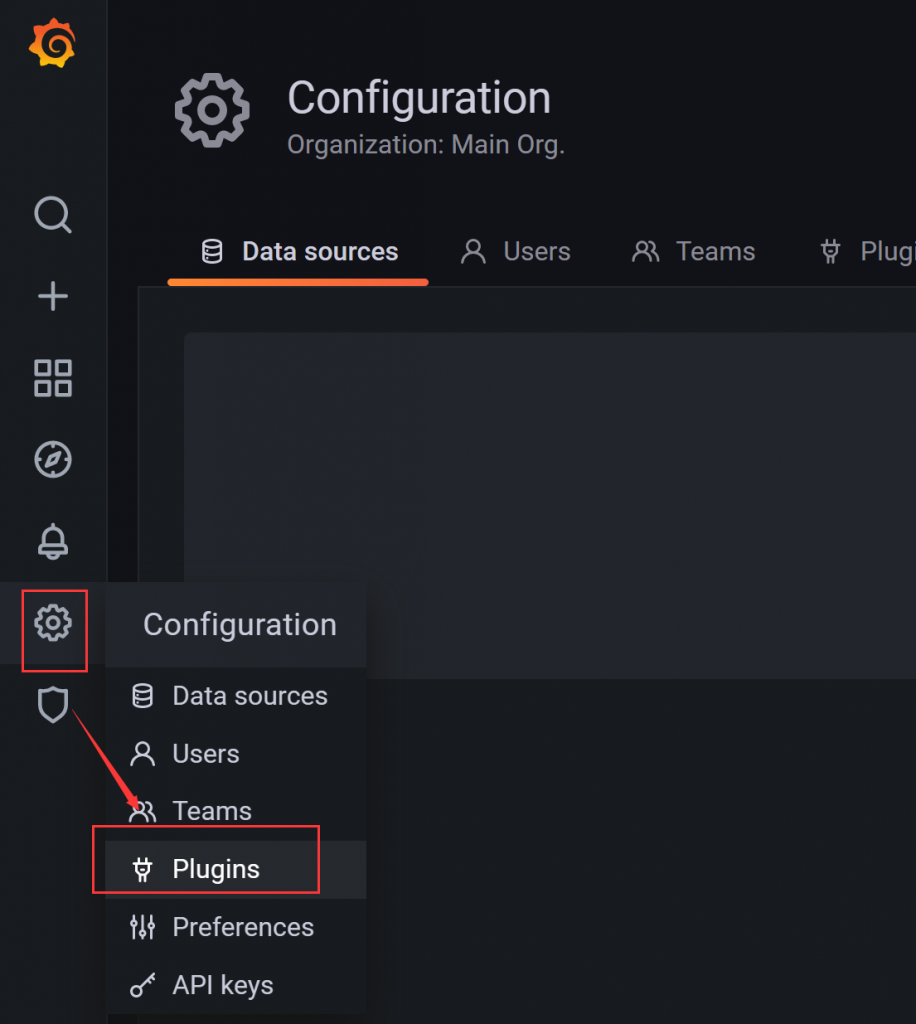
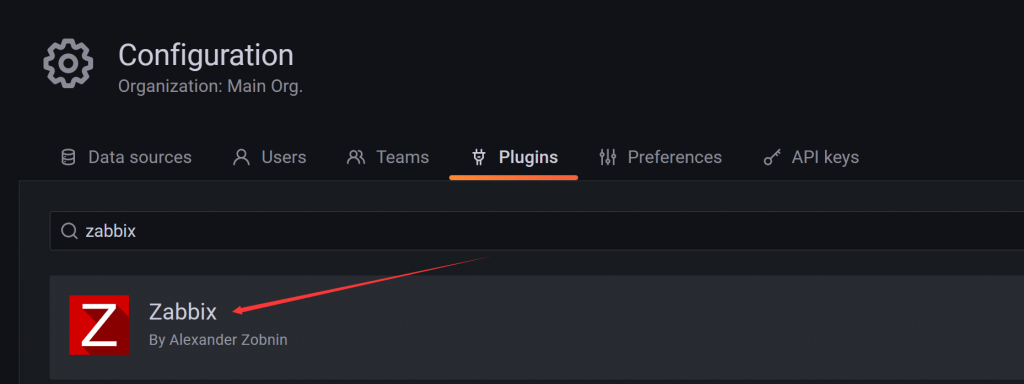
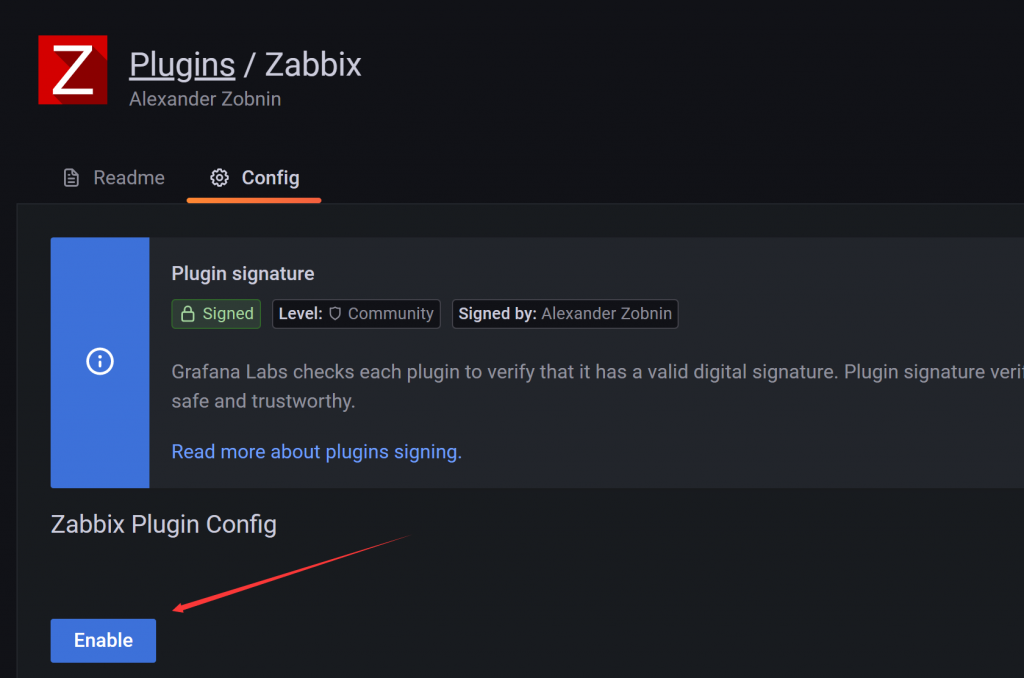
http://103.73.119.12:3000/admin/admin4.3、启用zabbix插件
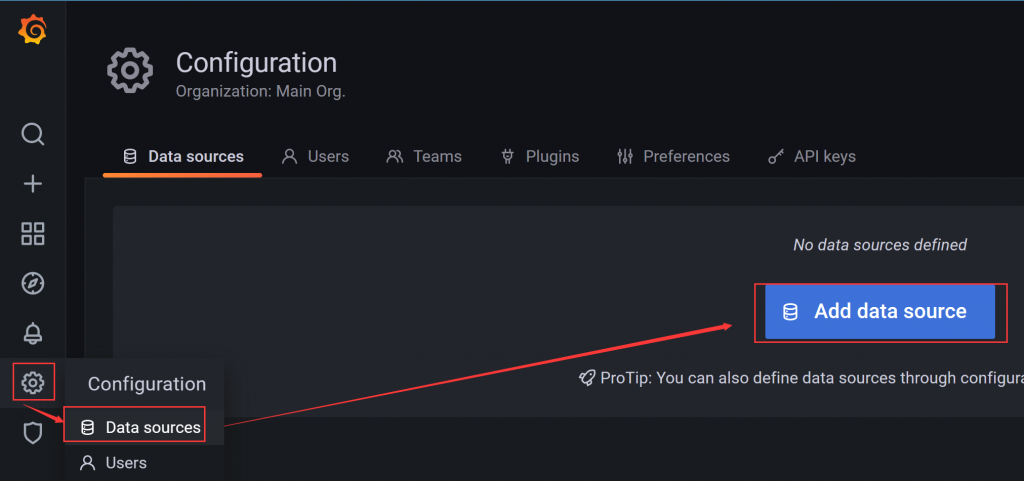
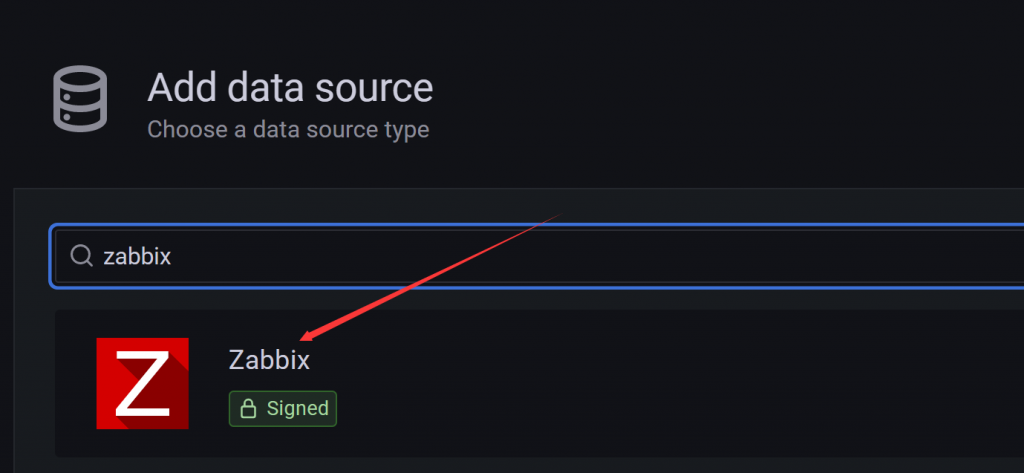
4.4、添加数据源
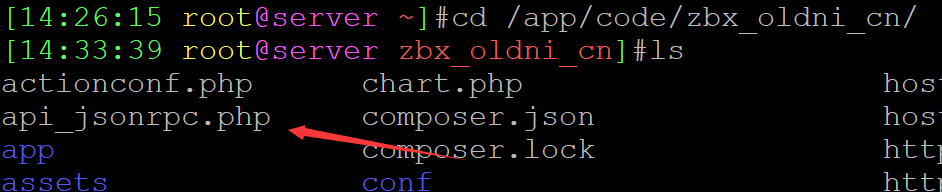
api_jsonrpc.php在站点目录下,如果在其它目录要对应起来
http://103.73.119.12/api_jsonrpc.php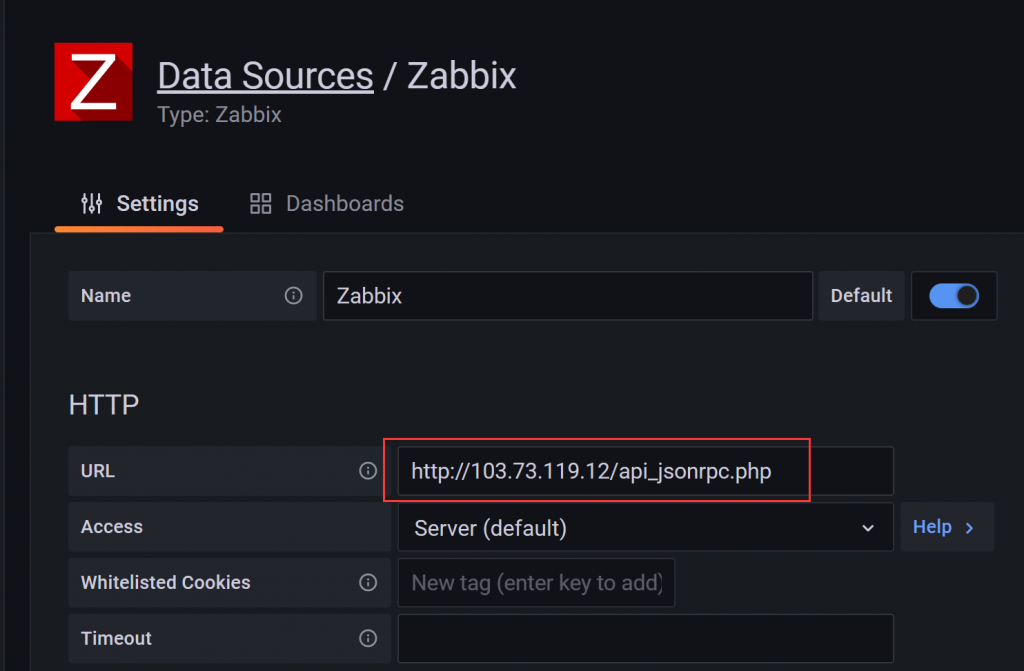
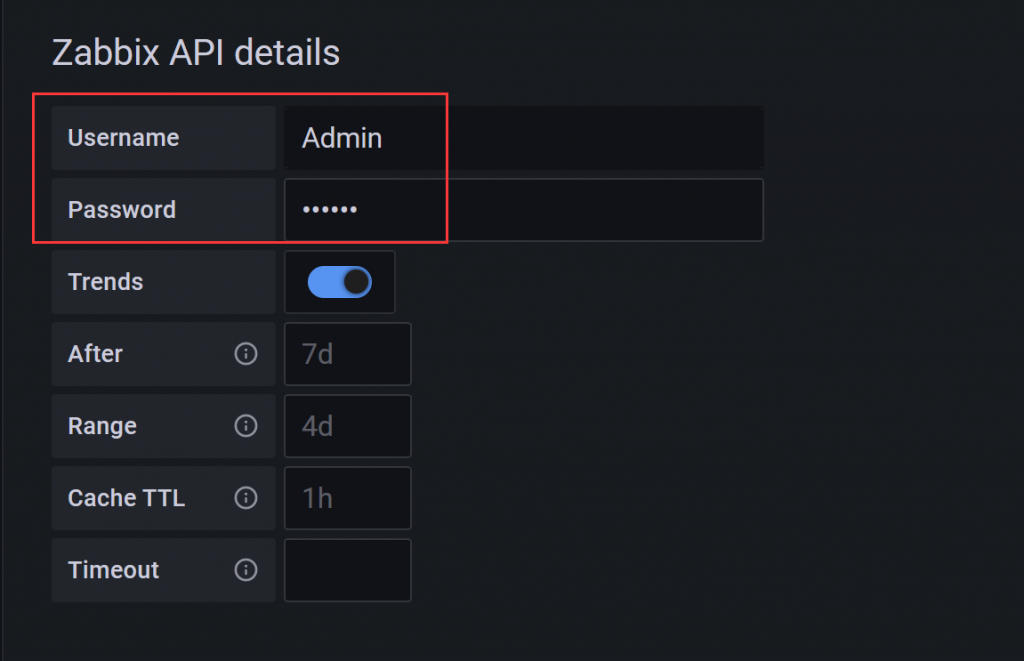
填写zabbix的访问用户名和密码
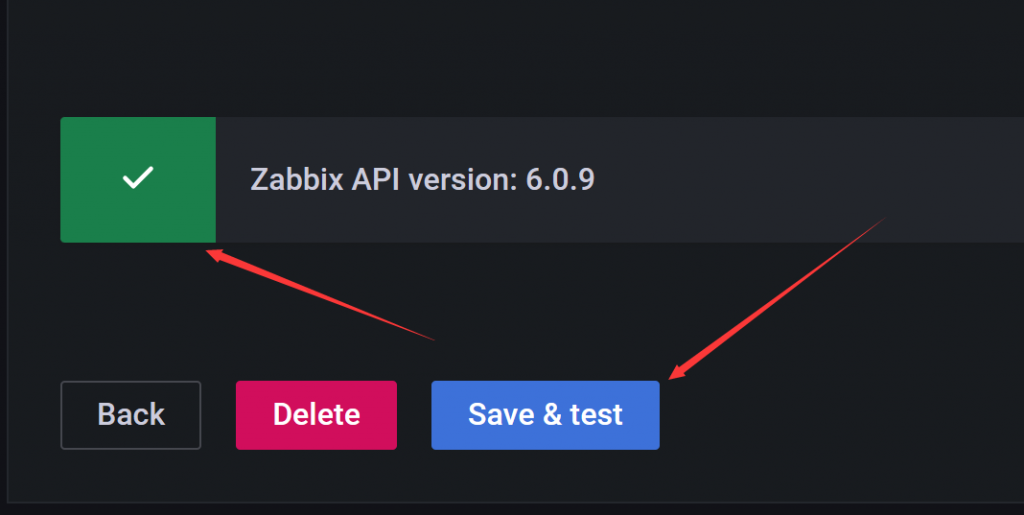
保存并测试,能读取zabbix的版本说明添加数据源成功
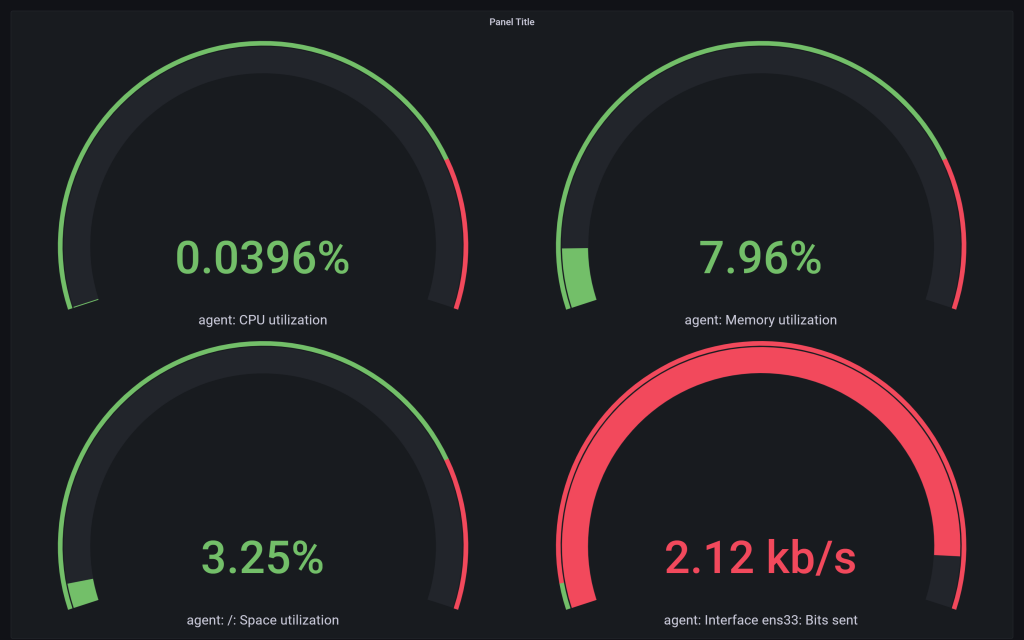
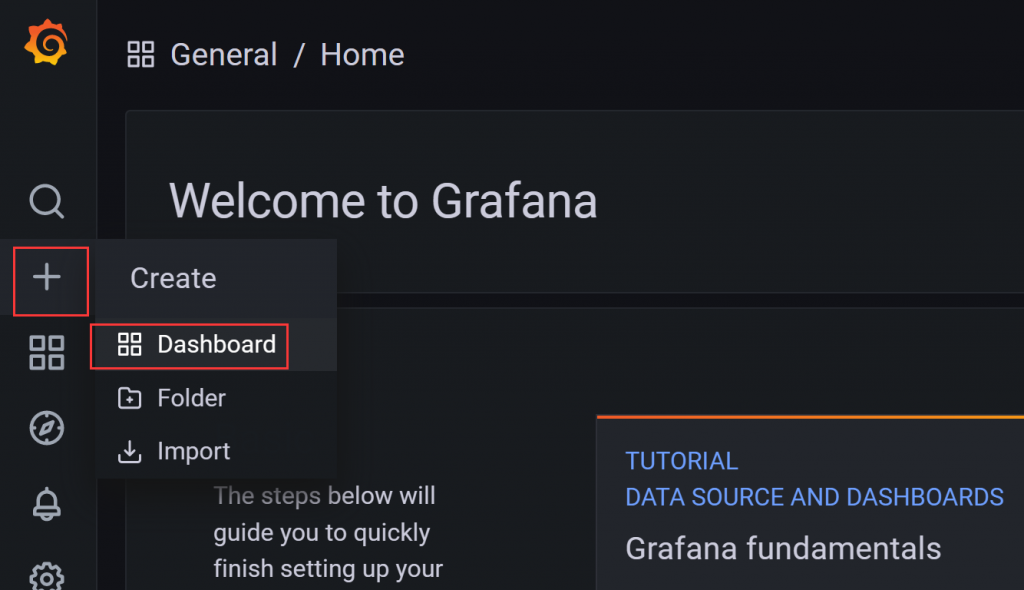
4.5、创建dashboard,添加panel
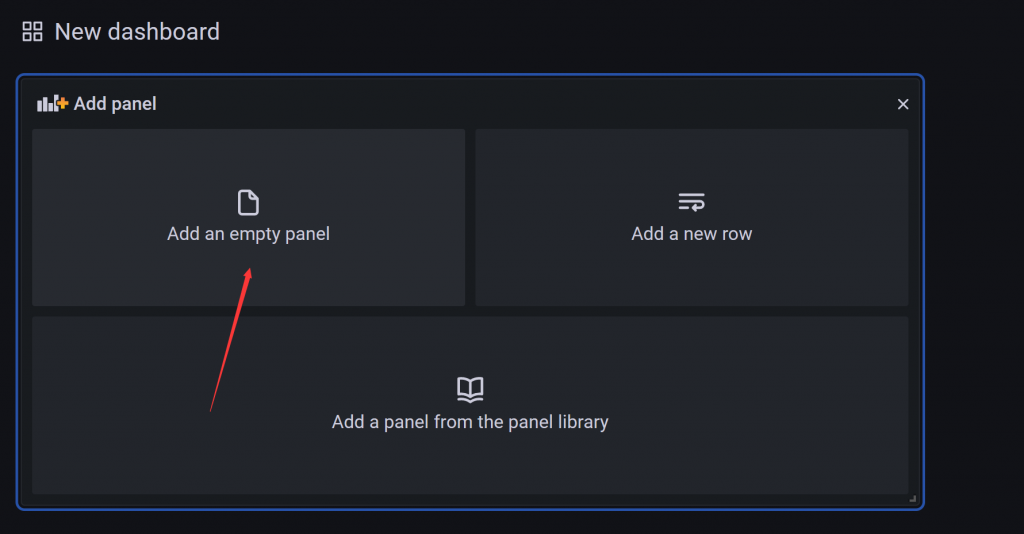
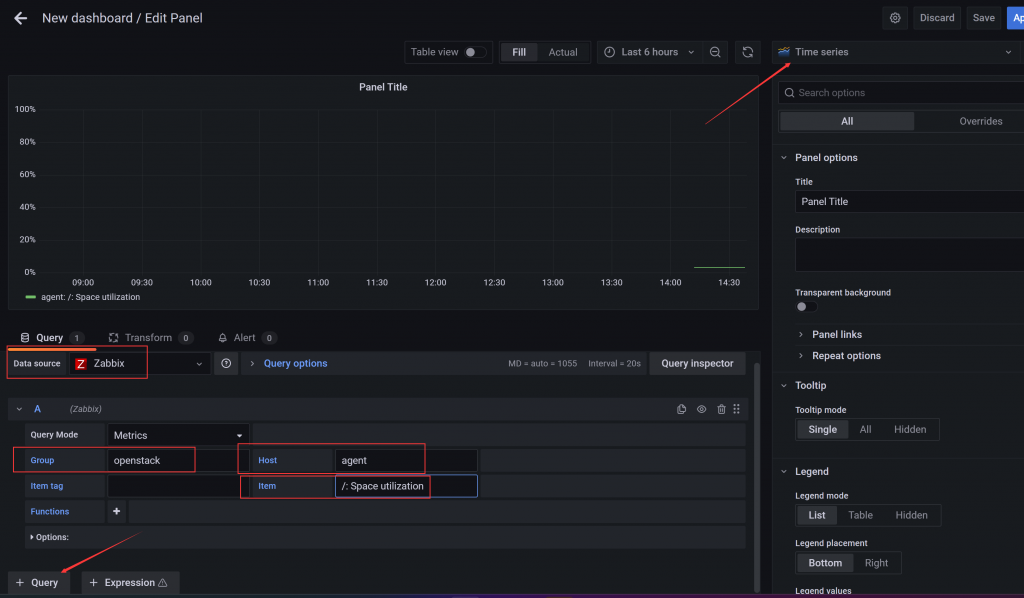
效果